[Update 2]: No need for manual Android 2.2 updates anymore. Official Android 2.2 has arrived and will be installed over-the-air in the next few days. [/Update 2]
[Update]: Another Android 2.2 update is now available: FRF83. It can be installed if you are running either FRF50 or FRF72. To update to FRF83 use the procedure below for the update process, but pick the correct update file for step 2 using download links from this post. [/Update]
Updated test version of Android 2.2 FRF72 for T-Mobile Nexus One is now available for download. You can follow the discussion about this update at xda-developers. FRF72 update can be installed if you’re currently running FRF50 test build of Android 2.2. If you don’t have FRF50 build installed, follow these instructions to install FRF50 first and then upgrade to FRF72. I will later report any observable changes between this latest test build (FRF72) and the previous one (FRF50).
Disclaimer
The Android 2.2 FRF72 build described in this post is not the final Android 2.2 build. This is a test build and some of your applications may stop working. If you do not feel comfortable performing this update on your own, wait for an official Nexus One OTA update from T-Mobile.
Pre-requisites
- Non-rooted Nexus One phone.
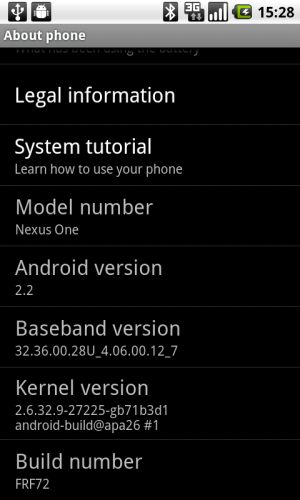
- Android 2.2 FRF50 build (listed under Settings -> About phone -> (scroll down) -> Build Number). If you haven’t previously installed FRF50, and your current build number is ERE27, you need to install FRF50 first by following these instructions.
Manual Android 2.2 FRF72 Installation
- Fully charge your phone since you don’t want your phone dying in the middle of an update process.
- Download to your computer zip archive of the FRF72 update using the following link. The name of the zip archive should be signed-passion-FRF72-from-FRF50.bc033f9e.zip.
- Rename downloaded file to update.zip.
- Connect Nexus One via USB cable and touch Select to copy files to/from your computer on the phone to connect it as a removable drive to your computer.
- Copy the update.zip file to the phone’s microSD card.
- Turn the phone off.
- Press Volume Down button and while holding it down press Power button to turn the phone on.
- Click once on the Volume Down button to highlight Recovery.
- Once Recovery is highlighted, press the Power button to proceed.
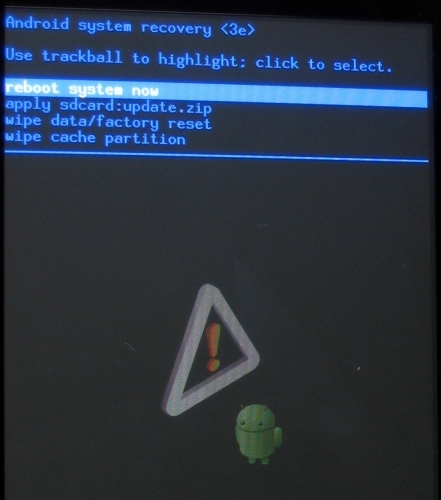
- You will see Android picture with an exclamation point in a triangle (don’t worry, it’s a part of the normal update process).
- Press simultaneously the Power and the Volume Up buttons (this may take a few tries).
- Android system recovery screen will appear.
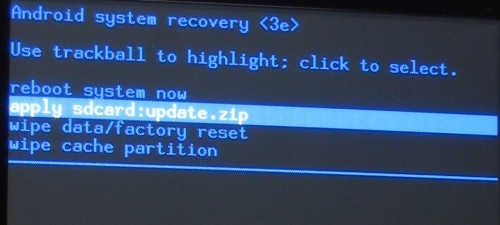
- Use the trackball (or the Volume Down button) to highlight apply sdcard:update.zip and press on the trackball to proceed.
- Note: be very careful when pressing down on the trackball. You don’t want your movement to be interpreted as a Scroll Down followed by an Enter, because the next item in the menu is wipe data/factory reset. If you accidentally perform a wipe, you will not “brick” your phone, but you will have to re-install all your apps after this update is completed.
Sit back and relax. Update process will complete on its own.
- Note: if your phone doesn’t reboot automatically after update is installed and the “install from sdcard complete” message is displayed, then manually select “reboot system now” and press on the trackball. Wait for the phone to boot and go to Settings -> About phone -> Build Number to make sure you are running FRF72. Enjoy!


 Twitter
 RSS
RSS
3 Trackbacks
[…] 2.1 ERE27 build to the unofficial Android 2.2 FRF50 test build. More recent Android 2.2 test build FRF72 is now available. To install FRF72 update, first you need to have FRF50 installed by following […]
[…] bongizmo.com Android to the Masses Skip to content HOMEANDROIDABOUT « How to update Android 2.2 (FroYo) FRF50 to FRF72 […]
[…] update procedure was described in details for the Froyo update and remains the same with the obvious exception of the update file downloaded in step 2. Make sure […]